Introduction
The spring season is knocking at the door and it’s a great time for building a raised garden box in your backyard. You’ll need a lot of materials for this project and topsoil is the most important component among them. To buy topsoil from a reputed nearby store, you can search for “topsoil near me”. Let’s check out raised garden boxes and how you can build one in your backyard.
The Details
- Raised garden beds – Raised garden beds or boxes are freestanding frames or boxes without any top or bottom. It sits in a sunny spot above the ground and is filled with high-quality soil. Usually raised beds are open at the bottom so that the roots can access nutrients below the ground. Apart from traditional boxed designs, raised beds can also be built without a frame. In this case, the soil is mound around 8 inches or higher and the top is flattened out. This way you don’t need to spend any money on materials.
- Benefits of raised garden boxes – There are numerous benefits of making a raised garden box. The primary benefit is obviously soil erosion. The soil is contained in the box and can’t be eroded away easily. It also makes for great drainage. Apart from that, soil in a raised garden bed is isolated from the cold bedrock in the ground. That means it warms up faster during the spring season and gives you a longer growing season.
Moreover, raised beds offer full control of the soil and that makes destructive and intense planting impossible. Instead, plants grown close together in a raised bed mature faster. Moreover, since raised beds are elevated over the ground, it is isolated from surrounding weeds and diseased weed-infested soil below. Say goodbye to your wedding chores.
Raised beds also prevent soil compaction since you or your guest never get the opportunity to walk over the soil, even by mistake. Instead, the soil stays loose and maintains its structure throughout the season without any labor-intensive digging on your part. Raised beds help you keep things in order. Your garden chores also get more comfortable and easier since the soil bed is raised. That means less bending and kneeling which hurts your back and joints.
If you have a small backyard, raised garden beds are perfect for you. They don’t take up as much space as a traditional row garden. You can also practice crop rotation with greater ease and make optimal use of the available space. With that out of the way, let’s check out how you can build a raised garden bed for yourself.
- Materials – You need plenty of materials to build a raised garden bed. Fortunately, it can be done cheap at just under $50. If you use untreated pine planks for the bed you can do the entire build within less than an hour. However, the untreated pine won’t last more than a decade. However, each board can be replaced easily without taking apart the bed completely. This makes repairs and maintenance easy. You’ll need the following materials to build a 4 by 8 feet bed:
- Two 2 by 12 planks that are 4 feet long.
- Two 3 by 12 planks that are 8 feet long.
- 12 pieces of 2-feet long rebar.
- One rubber mallet.
- Plenty of topsoil to fill up the frame.
- Cardboard or Newspaper.
- Figure out the right position for your boards – Lay the boards down on the flat ground and make the inner corners of the board touch each other. Stand one longboard by its side and use a rubber mallet to hammer two rebar pieces one foot from each corner. Hammer them down a few inches into the ground.
- Prop up the short sides – Use a rebar piece at the center of a shortboard for some temporary support. After that, prop up the second longboard and fine-tune the alignment of your frame. Hammer the rebar a few inches into the soil at least 1 foot away from each corner of the second long side.
- Frame reinforcement – Now it’s time to hammer the rebar pieces a few inches into the soil, one foot away from the corner of the short sides. After that, you can remove the rebar pieces used for temporary support. Next, add two rebar pieces 2 feet apart along the board boards. This reinforces the frame when it’s filled up with soil. Now you can hammer the rebar pieces until they have just around 6 to 10 inches exposed above the ground.
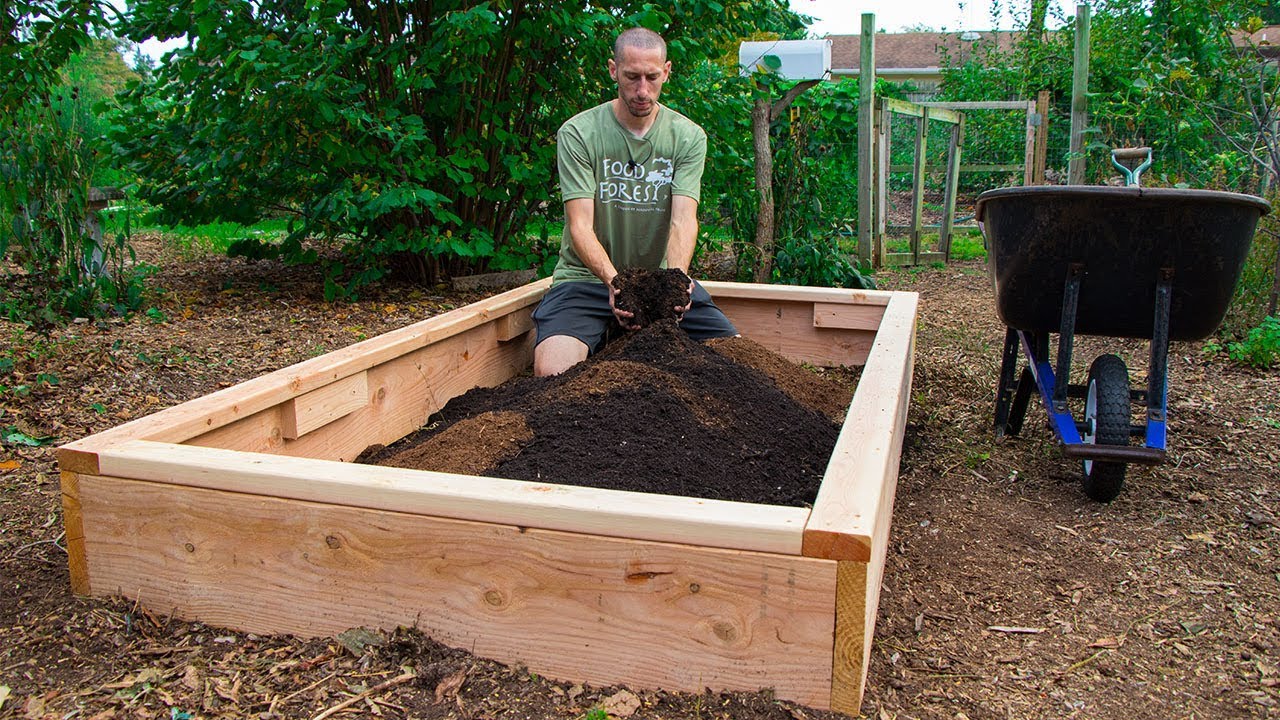
- Fill up the bed – With most of the work done, it’s time to line the bottom of the frame with cardboard or several sheets of newspaper. Next, you need to water it thoroughly. Now you can fill up the bed with soil. Make sure to leave a 2-inch gap from the top. Now your raised garden bed is ready for planting.
- Other building materials – While the above-mentioned method of constructing a raised garden bed is one of the cheapest ways to do it, you can use other materials if you have a generous budget. For instance, there are prefabricated kits that can be bought at home centers. They may be made from composite wood that is superior to pine planks in terms of resistance against rotting and insect infestation. They also get a better color compared to regular wood when they start fading over the years.
You can also use wattle or logs to build your raised garden box. With a wattle frame, you use long flexible sticks and weave them together. On the other hand, if you have recently cleared a tree from your backyard, you can use the logs to make a sturdy and all-natural frame.
Conclusion
Raised garden beds have plenty of benefits. From keeping your crops weed-free to preventing soil compaction. Follow the above-mentioned steps to build a suitable raised garden box in your backyard. If you need topsoil for the project, you can search for “topsoil near me” and buy it from a nearby store.


Comments