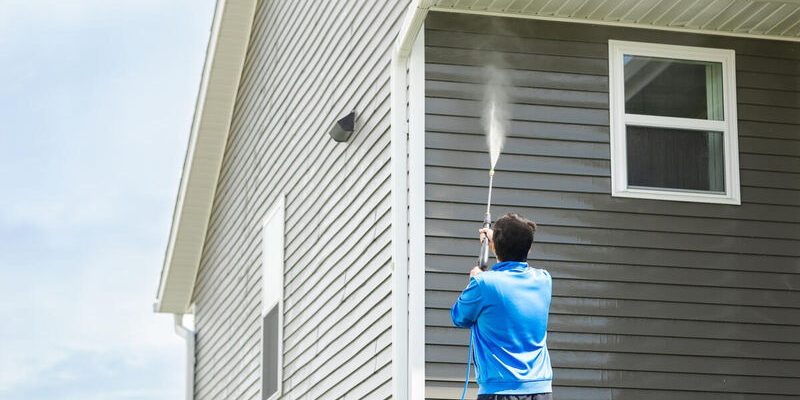
Giving your home’s exterior a proper clean can work wonders. Years of grime, dust, and greenish build-up vanish, revealing something much more presentable underneath.
It’s not just about appearances, either. Pressure washing helps fend off mould, mildew, and the odd tantrum in the British weather.
So, if you’re after a simple way to refresh your home and feel quietly accomplished, this might be just the ticket.
Choosing the Right Pressure Washer
When picking a pressure washer, the first decision is whether to go electric or petrol.
Electric models are smaller, quieter, and easier to handle, making them ideal for everyday jobs like garden furniture, car washing, or patio clean-ups.
Petrol machines are the heavy-duty option. They deliver higher pressure, so they’re better suited to tougher tasks like brickwork, driveways, or larger outdoor areas. They’re noisier and bulkier, but the extra power is worth it when the job demands more muscle.
When comparing models, two figures really matter: bar and litres per minute. For most household jobs, a pressure washer with 120 to 170 bar and a flow rate of 7 to 9 litres per minute is more than enough.
Lighter tasks, like washing garden furniture or bikes, can be done with around 100 bars, while patios and brickwork benefit from the higher end of that range.
If you’re after a reliable electric option, the Kärcher K5 Premium hits the mark without going overboard. For petrol-powered cleaning, the Simpson MegaShot is a popular choice, known for its solid performance.
Only planning to clean occasionally? Renting is a sensible option. Most local DIY shops offer pressure washer hire, particularly during the warmer months. It saves money and keeps your shed free of another bulky bit of kit.
Preparing the Area
A bit of prep makes a big difference.
Start by moving garden furniture, potted plants, or anything else in the way. Clearing the space keeps things safe and lets you work without obstacles.
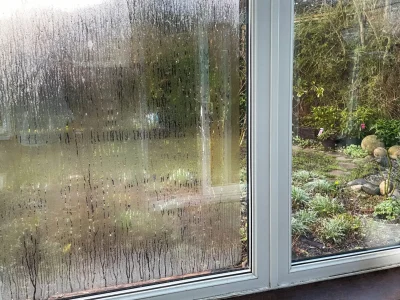
Cover your windows and doors with plastic sheets to stop water from getting in. If your car is parked nearby, move it well out of the way, as pressure washers can spray dirt and grit much farther than you might expect.
Next, give the area a sweep to clear leaves, stones, or debris. While you’re at it, check walls and surfaces for cracks or wear. It’s better to catch issues before they get worse under pressure.
Selecting the Right Cleaning Solution
Not every job needs the same approach. The right cleaner depends on the surface and the mess.
Eco-friendly detergents are a safe bet. They clean well and won’t harm plants, pets, or soil. Many are biodegradable and designed for pressure washers.
If you’re tackling oil stains, moss, or mildew, use a targeted cleaner, but always check it suits both your washer and the surface.
You can also whip up a cost-saving mix at home. White vinegar and baking soda are brilliant for general dirt and algae. They’re cheap, chemical-free, and gentle on most surfaces. Just avoid vinegar on natural stone, as it might cause discolouration.
For stubborn areas, apply the cleaner ahead of time and give it a moment to soak in. It’ll make the wash far easier and more effective.
Mastering Pressure Washing Techniques
There’s a knack to it, and technique matters. Start with the lowest pressure and test a small patch first, especially on wood, render, or older paint.
Hold the nozzle 60–90 centimetres from the surface. Any closer and you risk stripping paint or damaging mortar, particularly with stronger machines.
Work in slow, overlapping strokes. Horizontal sweeps are easier to control, though vertical ones suit walls and fencing.
In addition, begin at the top and move down to avoid dirty water trickling over cleaned bits. Take extra care around corners, trims, and joints, where water tends to gather and materials can be more delicate.
For those after a spotless finish without the hassle, professional exterior pressure cleaning services are worth considering, especially for trickier areas.
When you’re done, rinse well to remove detergent. Leftover suds can cause streaks or leave surfaces sticky.
Post-Washing Care
After all that effort, a few finishing touches help keep things looking fresh.
Start with a good look around. If any mould or stains remain, give them a quick, targeted cleaning. On concrete or stone, applying a sealant helps block moisture and reduce future staining.
Once surfaces are dry, it’s worth checking window seals, painted trims, and any external fittings for damage or wear. A quick touch-up can prevent more costly repairs down the line.
If you’ve washed near plants or lawns, give them a light rinse afterwards to remove any residue. Some cleaning solutions, even the mild ones, can linger and affect soil quality over time.
Don’t neglect your gear, either. Flush out detergent and store the washer somewhere dry. This prevents rust, freezing damage, and split hoses.
Lastly, set a reminder to repeat the process every six to twelve months. Homes near main roads, woods, or the coast need more regular upkeep. Keeping a basic log helps you stay on top of wear and catch recurring issues early.
Time-Saving Tips
Pressure washing is much quicker when you’re prepped. Lay everything out, fill the detergent tank, and check your hoses. This preparation saves you from scrambling once you’re soaked and in the middle of the job.
Got a large property? A second pair of hands can really help. Whether it’s shifting things, managing hoses, or tackling another bit of wall, it turns a big task into a breeze.
Avoid the hottest part of the day. Early mornings or later afternoons are best—less evaporation, fewer streaks, and more time to spot what you’ve missed.
Start with the grimiest areas first, usually north-facing walls, gutters, corners, or shaded patches. Tackle them early to stop muck from getting flung back onto clean surfaces.
Best of all, build it into your seasonal routine. Whether it’s a spring refresh or autumn spruce-up, sticking to a rhythm makes maintenance easier every time.
For multi-storey homes, consider using an extension wand or angled nozzle to save time climbing up and down ladders. It keeps things flowing smoothly and reduces risk.
And if you’re working in sections, group areas by material type—brick, render, wood—so you can adjust pressure and detergent settings just once for each batch. Little tweaks like this keep the pace steady without sacrificing results.
Conclusion
Well done, you! Tackling the outside of your home isn’t small work, but you’ve done it, and the place looks absolutely brilliant.
Now pop the kettle on, admire your handiwork, and enjoy the view. You’ve earned it!


Comments