
 By
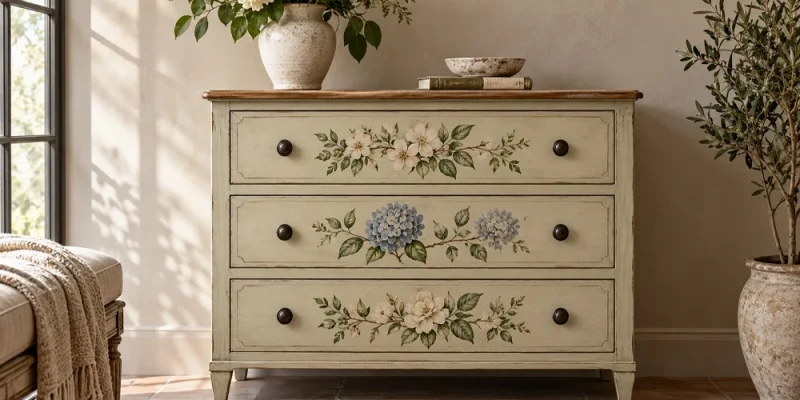
A plain dresser gives you a useful canvas: broad drawer fronts, repeated lines, and enough space for an image to become the main feature. The challenge is deciding how that image should sit on the furniture before the adhesive ever touches the paint.
This walkthrough focuses on a painted dresser with a floral or botanical design. It is a planning and application guide, not a report of a tested makeover. Read the instructions supplied with your chosen products, since preparation and finishing requirements can vary.
Before The Makeover: Decide What Deserves Changing
Look beyond the decoration. Check that drawers move properly, handles fit securely, and the structure is sound. Surface embellishment won’t fix a damaged runner or a loose joint. Resolve functional problems before deciding on paint and imagery.
Also consider the piece’s history. The Canadian Conservation Institute explains the value of preserving original furniture finishes. If a dresser may be an important antique, seek qualified advice before altering it. A sound, ordinary piece already intended for repainting is a better starting point for this project.
Step 1: Assemble A Restrained Design Kit
Gather your chosen image, application tool, measuring tape, low-tack tape, surface-appropriate cleaning materials and compatible paint and finishing products. Add a spare painted board to test the full finish sequence.
When browsing furniture transfers at Milton’s Daughter, compare the image dimensions with the usable drawer area. A design that looks modest on a product page may occupy most of a small chest. Check whether the sheet offers separate elements that suit your planned arrangement.
Choose one dominant motif. For example, use a bouquet across two drawer fronts, with a smaller sprig on an upper corner. Keeping the rest quiet makes the main image easier to read.
Step 2: Map The Image Before Preparing The Finish
Measure each drawer front and note the position of knobs, keyholes, and decorative edges. Sketch a rough layout on paper. Consider where a face, flower center, or other key detail would land.
A continuous design can look appealing when the drawers are closed, but gaps interrupt the picture. For a first project, arrange separate elements within individual drawer fronts. This avoids dividing a major detail across moving parts.
Mark the drawer order before removing hardware or drawers. Photograph the layout with the backing still attached. That reference will help you return to the intended placement after painting.
Step 3: Establish A Clean, Compatible Surface
The manufacturer’s transfer preparation and application guidance calls for a clean, dry, matte surface and well-cured paint. It recommends a matte water-based polyurethane layer before application for best adhesion.
Follow the paint and sealer labels for preparation and curing. Test the complete combination on your spare board before using it on the dresser. Avoid choosing a universal overnight waiting period: different coatings and conditions need different schedules.
Step 4: Position, Rub, And Check Gradually
Keep the image on its backing until you are ready. Position carefully, then use small pieces of low-tack tape to steady the carrier. Rub with the application tool, working across manageable sections.
Slowly lift the carrier to check the image. If part remains attached, lower it back into position and rub that area again. Gently smooth any raised bits, following the supplied directions. The manufacturer recommends a compatible protective sealer afterward.
Pause between elements to check the composition from standing distance. An extra sprig may look attractive up close but crowd the dresser from the doorway. Use your original photograph to keep the arrangement deliberate.
Step 5: Protect The Finish And Reassess The Hardware
Test your selected topcoat over the sample image before finishing the furniture. Follow its coverage and curing instructions, including when the dresser can return to normal use. Keep a note of the products used for later care or touch-ups.
Reinstall the handles and check the drawers again. Hardware can change the mood considerably: a simple dark pull may give a floral dresser more visual weight, while a quieter finish lets the painted image dominate. Try the existing handles before buying replacements.
The Final Styling Check
Place the dresser where it will live before adding accessories. Start with one lamp or vase, then leave some space above the strongest part of the design. Photograph the whole piece, not just its prettiest detail. That wider view reveals whether the decoration works with the room.
Explore Milton’s Daughter to choose a design and compatible supplies for a carefully planned vintage-inspired makeover.







Comments